How do you sew in hair extensions?
Sewing in hair extensions is a popular method for adding length, volume, and thickness to natural hair. This method involves sewing or braiding hair extensions into braids that are close to the scalp.
Here is a step-by-step guide on how to sew in hair extensions:
1. Choose the Right Type of Hair Extensions
Before sewing in hair extensions, you need to choose the right type of hair extensions that match your natural hair texture and color. Human hair extensions are preferred over synthetic hair extensions because they look more natural and can be styled in different ways. The hair extensions should also be of good quality, so they can last for a long time with proper care.
2. Prepare Your Natural Hair
Before sewing in hair extensions, it is important to prepare your natural hair well. Wash and condition your hair thoroughly with a sulfate-free shampoo and a moisturizing conditioner to keep it clean and hydrated. Dry your hair thoroughly so that it is not damp when you start the installation process.
3. Section Your Hair
Section your hair into small parts using hair clips. The sections should be small enough to braid and sew, and the clips will help keep the hair in place. Start at the nape of your neck and work your way up to the crown of your head.
4. Braid Your Natural Hair
Braid your natural hair into small, tight cornrows that will serve as the foundation for the extensions. The braids should be close together and run in the same direction to create a smooth base for the extensions. Braid your natural hair tightly and securely, making sure that the braids are neat and even.
5. Measure the Hair Extensions
Measure the hair extensions to fit the length of each braid. Make sure that the wefts are not too long or too short, and that they are aligned properly with the braids. Cut the excess hair extensions using a pair of scissors.
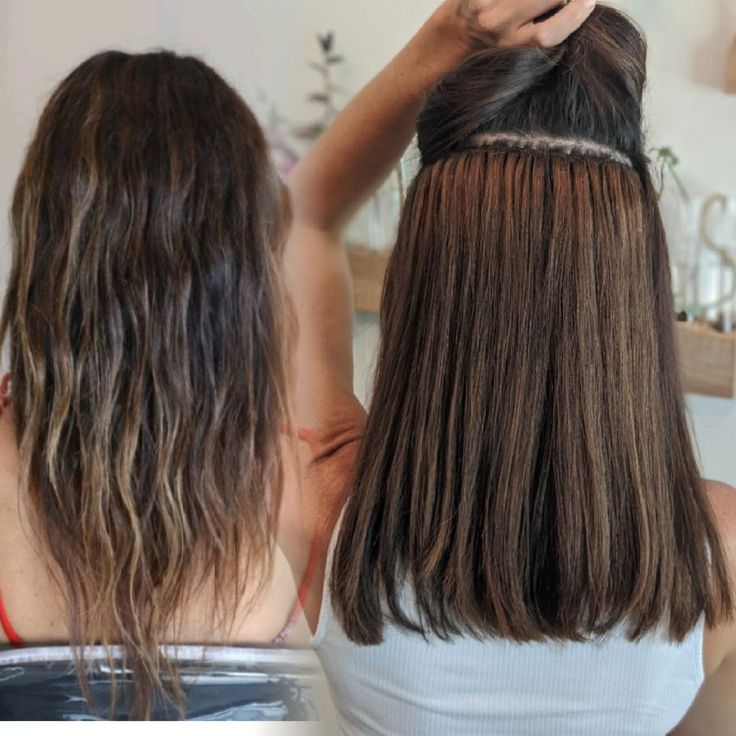
6. Sew in the Hair Extensions
Take the hair extensions and place them on top of the braids, making sure that they are aligned properly. Take a weaving needle and weave the hair extensions into the braids using a weaving thread. Start at the back of your head and work your way up to the front. Sew the hair extensions tightly and securely, but avoid sewing through the weft of the extensions, as this can cause damage.
7. Continue Braiding and Sewing
Continue braiding and sewing in the hair extensions until you have completed all the sections. Be sure to check that the extensions are aligned properly with the braids and that they are sewn in securely.
8. Cut and Style the Hair Extensions
Once all the hair extensions are sewn in, you can trim and style them according to your preference. Use a pair of scissors to cut the extensions to the desired length and shape, and then use a hair straightener or curling iron to create the desired style.
9. Maintenance
To keep your sew-in hair extensions looking great, it is important to maintain them properly. Use a leave-in conditioner to keep the hair hydrated, prevent tangling, and promote shine. Wash your hair extensions regularly using a sulfate-free shampoo and a moisturizing conditioner, and avoid using excessive heat or pulling on the extensions.
In conclusion, sewing in hair extensions can be a great way to add length, volume, and thickness to natural hair. The process involves braiding natural hair and sewing in hair extensions, and requires some preparation and skill. By following these steps, you can sew in hair extensions safely and effectively, and achieve a gorgeous and natural-looking hairstyle that enhances your overall look.