A Step-by-Step Guide to Creating Your Own Goddess Locs at Home
Goddess Locs are a popular and versatile protective hairstyle that has been embraced by women all around the world. With a combination of braids and loc extensions, this style provides excellent protection for natural hair while giving you a chic and stylish look. In this article, we’ll provide you with a step-by-step guide to creating your own Goddess Locs at home.
Step 1: Gather Your Materials
Before getting started, you will need to gather the following materials:
Pre-made locs extensions
Kanekalon braiding hair
Hair clips
Comb
Argan oil or any lightweight hair oil
Scissors
Step 2: Prepare Your Natural Hair
To prepare your natural hair, start by washing it with a clarifying shampoo to remove any product buildup. Then, condition it to add moisture and detangle it with a wide-tooth comb. After detangling, blow dry your hair with a diffuser or let it air dry.
Step 3: Braid Your Natural Hair
Next, section your hair into individual parts, and then braid each section into cornrows. Make sure your braids are not too tight and that each braid is neat and straight. It’s also important to make sure that all of your braids are facing the same direction.
Step 4: Add the Kanekalon Hair
Now it’s time to add kanekalon braiding hair to your natural hair. Start by taking a small section of the hair and attaching the kanekalon hair with a simple braid. You can use three strands of hair when braiding, with the extension hair included as one of the strands. Continue braiding down the length of the hair until you’ve created a tightly twisted braid.
Step 5: Add the Pre-Made Locs
After you’ve added all the kanekalon hair to your braids, it’s time to add the pre-made locs extensions. Take a pre-made loc and thread it through the base of each of your braids. Once the locs are attached to your hair, take a small section of the kanekalon hair and wrap it around the base of the loc. Use a hair clip to hold the wrap in place while you continue wrapping the rest of the hair around the extension.
Step 6: Secure the Ends
Once you’ve finished wrapping the extension hair around the pre-made loc, use a small amount of argan oil or any lightweight hair oil to seal the ends of the hair. This will prevent the hair from unraveling and keep your Goddess Locs looking neat and tidy.
Step 7: Repeat the Process
Repeat this process until all of your natural hair has been covered with Goddess Locs. Make sure that each extension is securely attached to your braids and that your hair is wrapped tightly around the base of each pre-made loc to prevent any slippage.
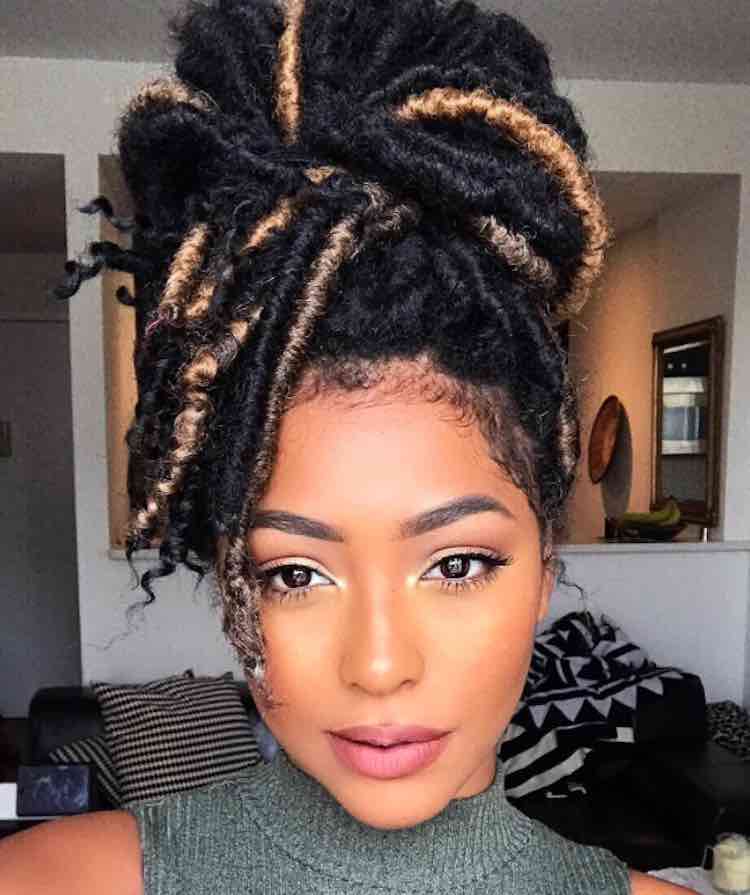
Step 8: Style Your Locs
Once you’ve completed the installation process, it’s time to style your locs. You can create a variety of styles with your Goddess Locs, such as a high ponytail, top knot, or even add beads or accessories for a unique look. Remember to be gentle when styling your locs, as they are a protective style and can easily be damaged if they are pulled or tugged too hard.
Step 9: Care for Your Locs
To keep your Goddess Locs looking their best, it’s important to care for them properly. Use a lightweight oil such as argan oil to keep your locs moisturized and avoid using heavy products that can cause buildup. You can also wash your locs periodically with a gentle shampoo and conditioner to keep them clean and fresh.
In conclusion, creating your own Goddess Locs at home is a fun and affordable way to achieve a stylish and protective hairstyle. By following these simple steps and using the right tools and products, you can achieve a beautiful and long-lasting look that will have you feeling like a true goddess. So, why not give it a try and see just how amazing your hair can look with this stunning style!