How to Bleach Hair at Home
Contents
hide
How to Bleach Hair at Home: A Comprehensive Guide
Bleaching hair at home offers an affordable way to dramatically change looks. However, this potent chemical process requires careful preparation and precautions. How to bleach hair at home?Improper application or excessive processing invites damage like breakage, dryness, and brassy tones.
With patience, the right supplies, and safety measures, anyone can successfully lighten hair from the comfort of home. This comprehensive guide covers all the essentials for flawless DIY bleaching results.
Research Precedes Any Bleaching Attempt
Before purchasing supplies, research lays the groundwork for home bleaching success. Understanding hair’s starting point helps establish realistic color goals and timing expectations.
Examine hair history including any previous color services, chemical treatments, or environmental exposure. Past bleaching or highlights greatly compromise hair integrity compared to virgin strands.
On a color scale, higher “levels” indicate lighter existing pigment saturation which proves easier to lift. Lower existing levels like black require multiple intensive sessions to achieve pale blonde goals.
Hair texture and porosity also impact lightening ability. Coarse, resistant hair lifts more slowly than fine textures. Applying products to overly porous, damaged hair creates uneven tones.
Bleach products feature different strengths and volumes for varying levels of lift. Higher volume developers like 30 or 40 provide dramatic lift but substantially more damage potential too.
Properly Preparing Hair and Workspace
Once expectations get set, start preparing hair, skin, and a safe work area for the bleaching process. This prep work pays off in clean, even results with minimal mishaps.
Start with squeaky-clean, product-free hair. Any lingering oils, silicones, or residues create barriers obstructing lightening. Use a clarifying or dishwashing liquid shampoo to remove buildup.
Thick coconut or olive oil protects the hairline and face by creating a barrier against bleach staining or irritation. Apply a generous coating around the hairline, ears, and nape using a cotton ball or makeup brush.
Cover surfaces with old towels or plastic sheeting to protect against drips. Nearby, arrange supplies like applicator brushes, bowls, clips, and gloves within reach. Good ventilation like an open window proves essential.
Always test a small, inconspicuous strand first. This preview shows how rapidly hair will lift and processes to desired tone. If strands feel dry or gummy, discontinue the service to avoid major damage.

Mixing and Applying Products Precisely
With all prep done, it’s finally time to mix and apply bleach solutions. Cross-checking instructions and proportions carefully prevents under or over-saturating hair.
Pour measured amounts of bleach powder and developer into a non-metallic bowl. Use a tinting brush to blend into a completely smooth, lump-free paste with desired consistency.
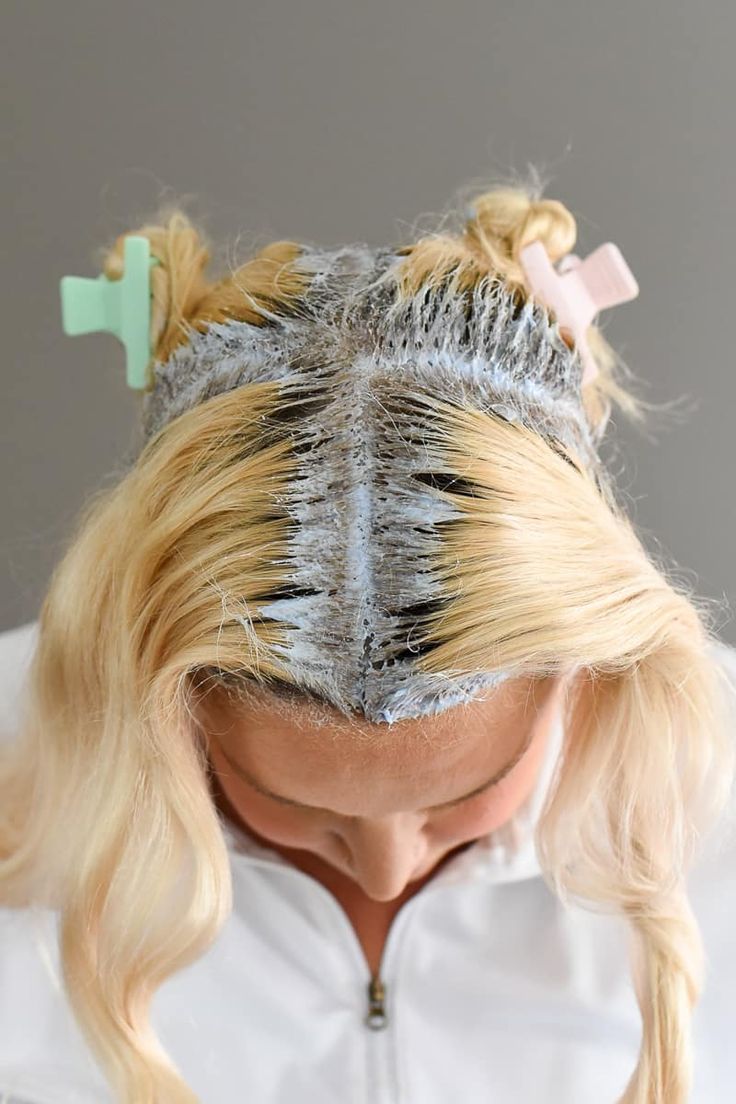
Section clean, dry hair into four evenly-divided quadrants using secure salon clips. This establishes an organized application pattern from roots to ends.
Using a tinting brush, coat the first quadrant with bleach mixture in clean, saturated sections about 1⁄4 to 1⁄2 inch thick. Work swiftly in a systematic manner from front to back.
Smooth bleach down from roots to ends in a fluid, consistent motion. Apply gently yet firmly to avoid disturbing the cuticle or causing unwanted overlap.
Repeat this quadrant-by-quadrant application, frequently cleaning the brush between sections. Avoid overlapping bleach layers which causes banding and patchiness.
Check the initial test strand periodically to monitor lifting progress. Take notes on how quickly it transitions to minimize overlapping or under-developing.
Rinsing and Refreshing Post-Bleach
As hair reaches the desired tone, begin rinsing each quadrant individually using cool-lukewarm water. Cooler temperatures help seal the cuticle while removing all bleach residue.
Gently squeeze out excess water before saturating fully with a ultra-moisturizing deep conditioner or mask. Focus on porous, over-lightened areas which crave hydration most desperately.
Let the rich treatment soak in for 5-10 minutes before rinsing thoroughly. Apply a bonding or reconstructing treatment next to reinforce and re-link weakened protein strands.
If brassiness still lingers, apply a specialty purple or blue toning glaze to neutralize unwanted warmth. These pigmented glazes refresh pale, cooler blonde tones while equalizing porosity.
Maintain the Delicate, Lightened Condition
Once hair dries, it requires specialized post-bleach maintenance to preserve lustrous blonde while minimizing damage. Focus on frequent hydration, gentle handling, and extending the bleach’s longevity before fading.
Bleached hair exhibits a naturally rougher, thirstier texture thanks to its lifted cuticles. Remedy chronic dryness with ultra-moisturizing, color-safe shampoos, conditioners and weekly hair masks.
Always use cool water when rinsing or shampooing bleached hair. Hot temperatures rapidly strip moisture and precipitate brassy tones. Rinse-out UV-protective sprays also defend against oxidation.
Limit heat styling with tools over 300F and always use bonding or damage-prohibiting styling aids. Avoid over-brushing bleached hair when dry to minimize mechanical damage and breakage.
Bi-weekly toning glosses or glazes refresh cool, icy blonde tones by resettling pigment and equalizing porosity. Regular clear shine-enhancing glosses also smooth the bleached cuticle.
When To Seek Professional Help
While DIY bleaching at home saves money, some scenarios warrant professional assistance to prevent disastrous mishaps or irreversible damage.
Consider consulting a stylist when opting for drastically lighter end goals than the existing base shade. Drastic color changes require multiple meticulously-timed sessions to prevent over-lifting.
Those with highly resistant gray hair, previous chemical treatments, or substantially damaged locks should skip the DIY route. Texture inconsistencies could create unevenness when self-applying.
For first-time bleaching attempts, scheduling a salon service provides education and guidance regarding proper product selection and timings. Bleaching remains potent, so learning best practices proves worthwhile.
While at-home bleaching offers accessible transformation, stylists help navigate the complex chemistry with care, realism and beautiful results. Their expertise solves issues before they start.
Achieving Safe and Striking Blondes At-Home
Home bleaching presents challenges yet can refresh hair with professional precision. Thorough preparation, cautious application, and restorative aftercare ensure lifting stays gentle yet controlled.
Use lower volume developers for subtle lift with minimal damage. On darker bases, opt for slow, strategic highlighting techniques over all-over bleaching. Prioritize hydrating, bonding haircare to offset the bleaching stressors.
Working slowly, carefully monitoring lifting progress and acting conservatively allow everyday people to earn beautiful blondes between salon appointments. With the right habits and precautions, embracing DIY bleaching unlocks countless new hair possibilities.