Mastering Mini Twists on Natural Hair
What Are Mini Twists?
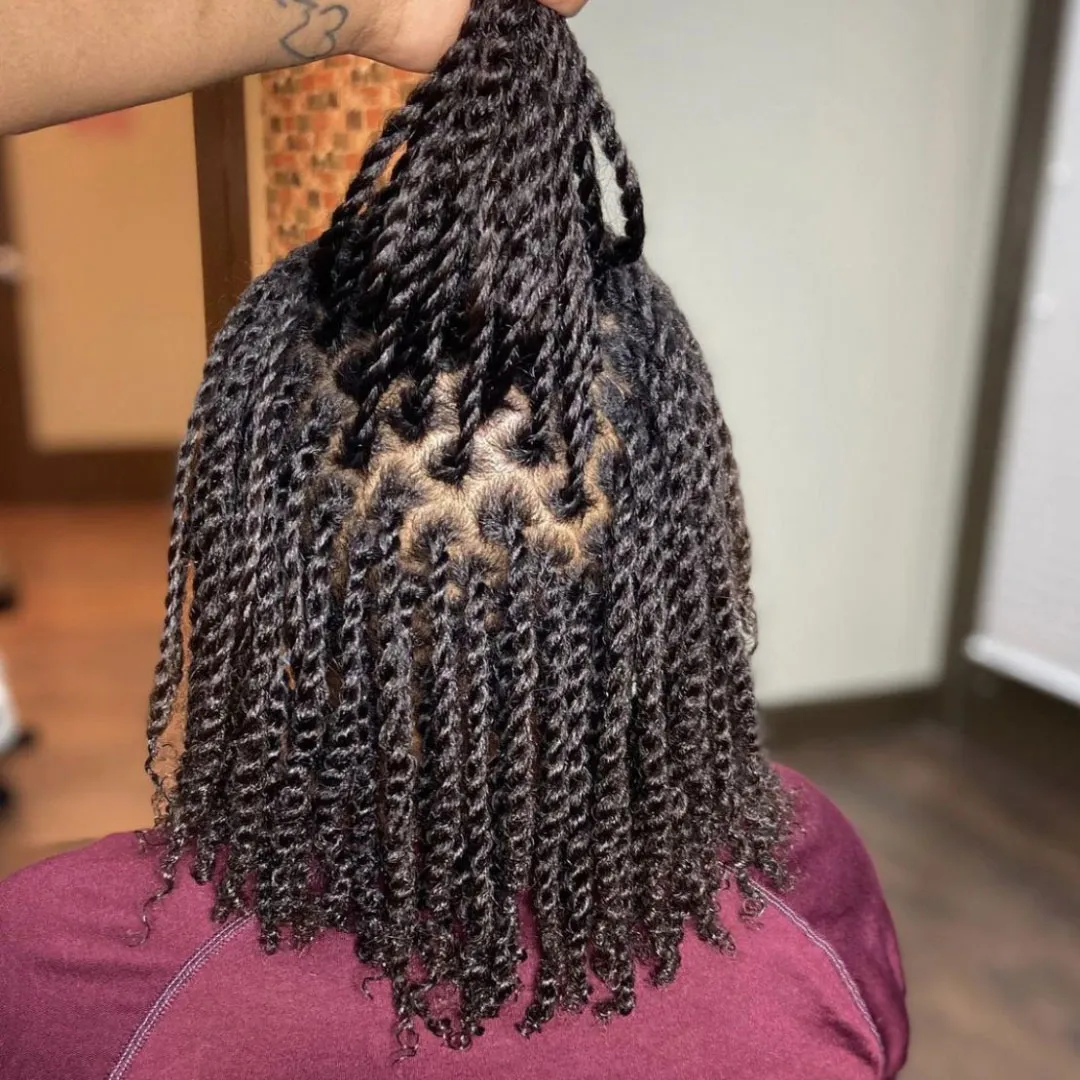
Mini twists are a popular protective hairstyle for natural hair. They involve twisting small sections of hair from the roots to the ends. This style can suit various hair textures but works especially well on textured, curly, or coily hair. Mini twists help minimize hair manipulation and protect the ends from damage.
Installing mini twists is a meticulous process that requires patience and care. It’s a versatile style that can last several weeks with proper maintenance. When done correctly, mini twists can be a low-maintenance hairstyle that promotes hair growth and health.
For those new to this style, mini twists are essentially tiny, single-strand twists. Unlike larger twist styles, they are more time-consuming to create but offer more styling flexibility. They can be worn loosely hanging or styled into elegant updos and chic styles, making them perfect for any occasion.
To ensure longevity and minimize frizz, it’s vital to install mini twists on clean, well-conditioned hair. This foundational step will be detailed later in the guide, emphasizing its importance for achieving ideal results with your mini twists using natural hair.

The Benefits of Mini Twists for Natural Hair
Mini twists on natural hair offer numerous advantages. Firstly, they are excellent for retaining moisture. Unlike loose hair, twists provide a compact structure that slows the rate of moisture loss. This is crucial for natural hair, as it tends to be more prone to dryness.
Secondly, mini twists encourage length retention by securing the ends of the hair, which are the oldest and most fragile part, thereby reducing split ends and breakage. This protective style prevents daily wear and tear from styling, manipulation, and environmental factors.
Additionally, mini twists reduce the frequency of hair manipulation, thereby limiting mechanical stress. With mini twists, daily combing and styling are not required, which lowers the risk of accidental hair damage.
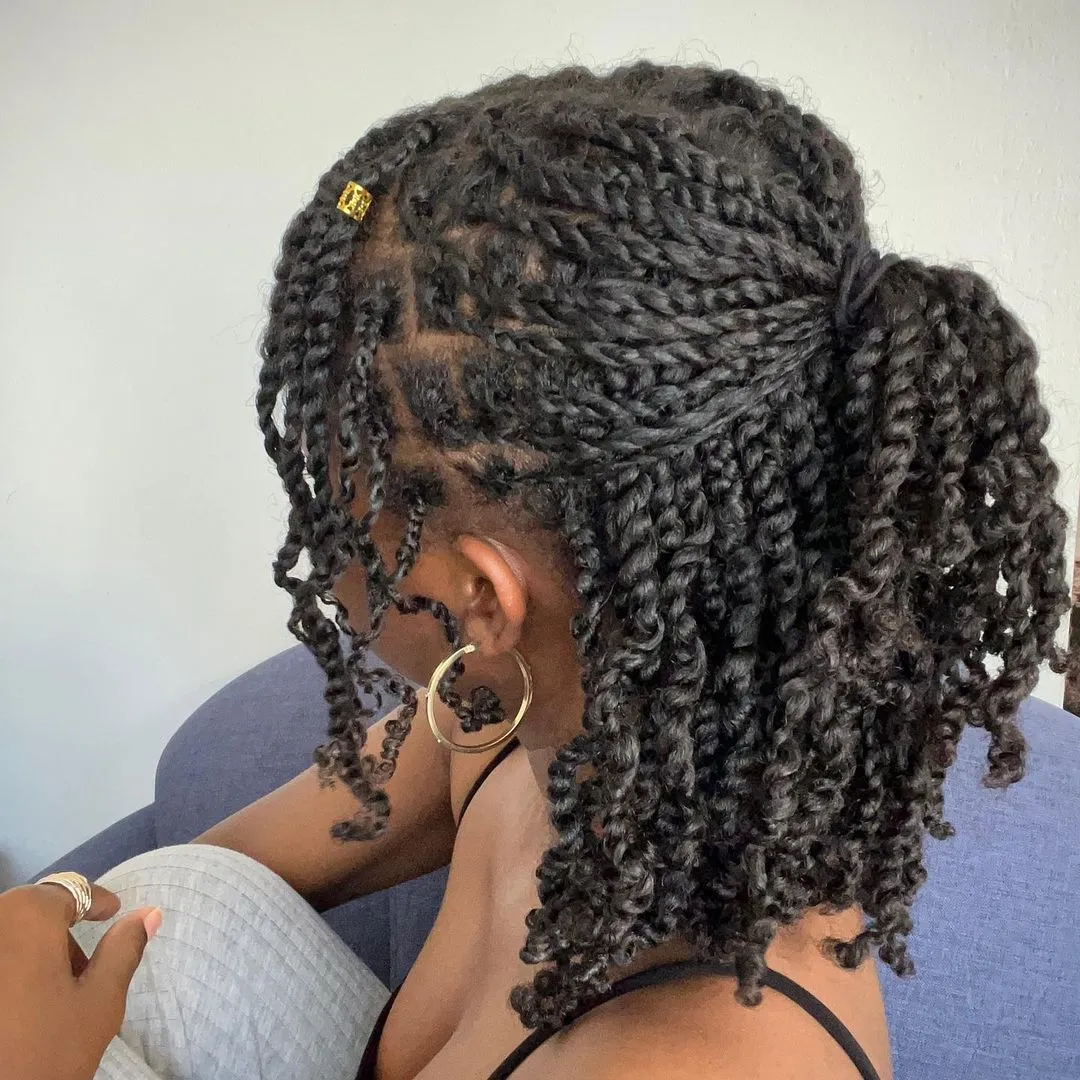
Furthermore, mini twists offer a great deal of versatility in styling. They can be worn down, pulled into a ponytail, twisted into a bun, or styled in an updo for special occasions, adding to their practical appeal.
Lastly, for those seeking to boost hair growth, mini twists are beneficial. The lack of frequent manipulation and the protection of the ends facilitate a conducive environment for growth. Thus, people often notice significant growth when they untwist after a few weeks.
In summary, mini twists help maintain the health of natural hair by reducing damage, retaining length, and preserving moisture all while offering several styling options.
Preparing Your Hair for Mini Twists
Proper preparation is key to ensuring your mini twists look great and last longer. Before you begin installing mini twists on your natural hair, you should follow these essential steps:
- Start with Clean Hair: Wash your hair using a sulfate-free shampoo. This will remove any buildup without stripping your hair of its natural oils.
- Deep Condition: Apply a deep conditioner to replenish moisture. Natural hair thrives on hydration, which will make your mini twists more resilient.
- Detangle Carefully: With a wide-tooth comb or your fingers, gently detangle your hair. This makes twisting easier and prevents breakage.
- Dry Hair Properly: After washing, wrap your hair in a microfiber towel or an old t-shirt. These materials are gentler on your hair than traditional towels and reduce frizz.
- Apply Leave-In Conditioner: Use a good leave-in conditioner to add an extra layer of moisture. Distributing it evenly will give you a smooth base for your twists.
- Trim if Necessary: If you have split ends, trim them before installing mini twists. This helps in maintaining healthy hair and an even twist pattern.
- Stretch Your Hair: To achieve a more defined twist, you can gently stretch your hair through techniques like banding or using a blow dryer on a cool setting.
- Protect Your Edges: Apply a nutrient-rich hair oil or balm to your hairline. This will protect the delicate edges from any tension caused by the twists.
Remember, the goal is to create a healthy foundation for your mini twists that will promote longevity and minimize potential damage to your natural hair. By following these steps you can begin the installation process with confidence, knowing that your natural hair is prepared and protected.

Step-by-Step Guide to Installing Mini Twists
Now that your natural hair is clean, conditioned, and prepped, it’s time to start installing your mini twists. This step-by-step guide will walk you through the process to ensure your twists are neat, uniform, and last as long as possible.
- Section Your Hair: Part your hair into manageable sections. Use clips to keep them separated. Small, even sections make for the best mini twists.
- Twist Each Section: Take a small piece of hair from one of your sections. Divide it into two and twist from the root to the end. Be consistent with the tension to prevent scalp stress.
- Secure the Ends: A small dab of hair butter or oil can help seal the moisture in and secure the ends of your twists. This reduces unraveling and breakage.
- Minimize Frizz: Work with one section at a time, and re-clip others to avoid frizz. Twisting on damp hair also helps to keep frizz at bay.
- Continue Throughout: Repeat the twisting and securing process across your entire head. Regularly check for uniformity in twist size for a cohesive look.
- Dry Thoroughly: Allow your twists to dry completely. You can air dry or use a hooded dryer on a cool or low setting. This step is crucial to prevent any mildew smell.
- Final Touches: Once dried, apply a light oil for shine and a slight run-through with your fingers to neaten them up. Wearing a satin scarf or bonnet at night will help preserve the style.
Follow these steps carefully, and your mini twists on natural hair will not only look stellar but will also serve as a protective style for an extended period. Throughout this process, ensure that each twist is handled with care to foster hair health and growth.
Tips for Maintaining Mini Twists
Maintaining mini twists on natural hair ensures they look fresh and last longer. Follow these tips to keep your mini twists in excellent condition.
- Moisturize Regularly: Apply a light oil or spray with water and seal with butter. Keep your hair hydrated to avoid dryness.
- Sleep With a Satin Bonnet or Pillowcase: This reduces frizz and prevents your twists from snagging on rough fabrics.
- Refresh the Scalp: Use a gentle scalp cleanser or oil to maintain a healthy scalp environment.
- Retwist Loose Twists: Over time, some twists may get loose. Retwist those sections to keep your style neat.
- Avoid Heavy Products: Heavy products can weigh down your twists. Stick to lightweight options that don’t build up.
- Limit Washing: If you wash too often, your twists can frizz or unravel. Try spot cleaning or using a dry shampoo if needed.
- Be Gentle While Styling: When styling your mini twists, handle them with care. Harsh pulling can lead to frizz and damage.
By following these tips, your mini twists can look beautiful for weeks. They need a balance of care and light handling to thrive.

Styling Options for Mini Twists
Once you’ve installed your mini twists on natural hair, the fun truly begins with styling! Mini twists are incredibly versatile, allowing for a multitude of looks that can cater to any event or mood. Below are several styling options you can experiment with to keep your mini twists looking fresh and trendy.
- Pulled Back Ponytail: Gather your mini twists into a low or high ponytail. Secure with a soft hair tie to avoid tension.
- Twist-Out: After a few weeks, untwist them for a bouncy twist-out with defined curls.
- Half-Up, Half-Down: Pull the top half of your twists into a ponytail or bun, letting the rest hang freely.
- Accessorize: Add headbands, scarfs, or hair clips for a touch of elegance or playful charm.
- Updos: Create sophisticated updos by twisting your mini twists into a bun or French twist.
- Side Swept: Sweep your twists to one side for a chic, asymmetrical look. Secure with bobby pins if needed.
- Braided Crown: Braid some twists along the hairline to form a crown-like headband.
- Buns: Experiment with single or double buns, also known as space buns, for a fun and youthful vibe.
- Twisted Halo: Twist a section of your mini twists around your head to form a halo, securing with pins.
Remember, while styling your mini twists, it’s important to handle them gently to avoid frizz and potential damage. Each of these styles should maintain the integrity of your twists and keep them in great condition. Enjoy the versatility of your mini twists and don’t be afraid to try new looks!
Washing and Conditioning While in Mini Twists
Maintaining the cleanliness and hydration of your mini twists natural hair is crucial. It ensures that your scalp and hair remain healthy throughout the duration of the style. Here are simple steps to wash and condition your mini twists without causing frizz or unraveling.
- Dilute Your Shampoo: Mix a sulfate-free shampoo with water. This creates a gentler solution.
- Apply with Care: Use an applicator bottle to target your scalp. Massage gently to avoid tangles.
- Rinse Thoroughly: Pour lukewarm water over your head. Ensure all shampoo is washed out.
- Condition Carefully: Apply a lightweight conditioner. Focus on the length of your twists, not just the roots.
- Leave-In for Lock-In: Post-rinsing, use a leave-in conditioner. This step adds extra moisture.
- Pat to Dry: Never rub your twists. Pat them with a microfiber towel to soak up water.
- Air Dry Fully: Let your mini twists air dry completely. This prevents mildew and odor.
- Oil the Scalp: Once dry, apply a light oil to your scalp. This will nourish and soothe.
- Moisturize Ends: Use a hair butter to seal in moisture at the tips of your twists.
By following these steps, you can clean and maintain your mini twists without inflicting harm. Keeping a routine will help your style look fresher and last longer. Remember, be gentle with your natural hair to preserve both the twists and their benefits.

Removing Mini Twists Without Damage
Removing mini twists from natural hair requires care to avoid breakage and preserve hair health. Here are effective methods to follow:
- Apply a Moisturizer: Before unraveling, apply a light oil or moisturizer. This helps smooth out the hair.
- Gently Untwist: Start from the ends and slowly work your way up to the roots. Take time and do not rush.
- Use a Wide-Tooth Comb: After untwisting, use a wide-tooth comb for detangling. Start from the ends.
- Wash Thoroughly: Once all twists are out, wash your hair with a gentle, sulfate-free shampoo.
- Deep Condition: Follow up with a deep conditioning treatment to restore moisture.
Remember, being gentle is key to removing mini twists without damaging your natural hair. Follow these steps to keep your hair healthy and ready for the next style.

