How to Create a Milky Shine Gel Polish Look with Ombre Effect?
Milky shine gel polish is a trendy and versatile nail color that offers a fresh and modern look. An ombre effect adds a unique twist to the milky shine gel polish look, creating a beautiful and eye-catching manicure. In this article, we will discuss how to create a milky shine gel polish look with an ombre effect.
Step 1 Prepare Your Nails
Start by preparing your nails for the manicure. Remove any old nail polish and trim your nails to your desired length. Use a nail buffer to gently buff the surface of the nails to remove any ridges or bumps. Make sure to push back your cuticles and trim any hangnails.
Step 2 Apply a Base Coat
Apply a thin layer of base coat to your nails to protect them from staining and increase the wear time of the polish. Allow the base coat to dry for a few minutes.
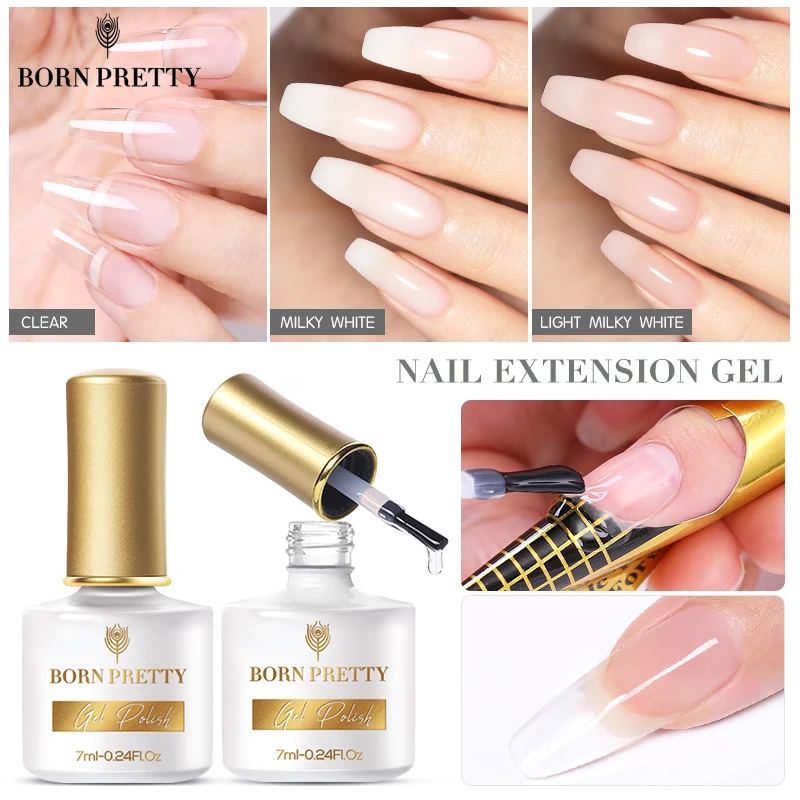
Step 3 Apply the Milky Shine Gel Polish
Using a milky shine gel polish of your choice, apply a thin layer to the nails. Be careful not to apply the polish too thickly, as this can cause the polish to peel or chip. Apply the polish in thin, even strokes, and make sure that the edges of the nails are covered. Cure the polish under a UV lamp for two minutes.
Step 4 Apply the Ombre Effect
To create the ombre effect, you will need a sponge. Apply the two gel polish colors that you want to use for the ombre effect side by side on the sponge. Gently press the sponge onto the nail, starting from the base of the nail and moving towards the tip. Repeat this process until you achieve your desired ombre effect. Cure the polish under a UV lamp for two minutes.
Step 5 Apply a Top Coat
Apply a thin layer of top coat to the nails to protect the polish and give it a glossy finish. Cure the polish under a UV lamp for two minutes.
Step 6 Clean Up the Cuticles
Using a brush dipped in acetone or gel polish remover, carefully clean up any excess polish around the cuticles or edges of the nails.
Step 7 Moisturize Your Nails and Cuticles
Apply cuticle oil or moisturizer to your nails and cuticles to keep them hydrated and healthy.
How to maintain the gel polish?
To maintain the longevity of gel polish, it is important to follow these steps:
Avoid using harsh chemicals: Avoid using harsh chemicals such as acetone, bleach, or cleaning products that can cause the polish to chip or peel.
Wear gloves: Wear gloves when doing housework or any activity that involves handling chemicals or water.
Moisturize: Keep your hands moisturized by using hand cream or cuticle oil regularly. This will prevent the polish from cracking or peeling.
Avoid picking or biting the nails: Picking or biting the nails can cause the polish to lift or peel. This can also damage the natural nail underneath.
Get regular touch-ups: If you notice any chips or peeling, get a touch-up done at the salon. This will help prolong the life of the polish.
Avoid excessive heat: Avoid exposing your nails to excessive heat from hot water or direct sunlight. Heat can cause the polish to break down and fade.
Avoid using your nails as tools: Avoid using your nails to open cans, peel off labels, or perform any other tasks that may cause your polish to chip or peel.
By following these simple steps, you can maintain your gel polish and keep your nails looking fresh and glossy for several weeks.